Bon Appetit’s Iced Coffee Shakerato
What do you get when you cross early-morning marathon training with a need for coffee and only coffee first thing when you wake up? Uhhh, good question, let me introduce you to the answer. World, meet iced coffee shakerato, the revolutionary coffee drink that finds that middle ground between the rushed and convenient coffee and the luxuriously long and slow coffees of my past. And boy is it absolute perfection.
I’ve had coffee in my life for a long time, like since 2-years-old long time, all the way back to the days of stealing sips out of my mom’s cup. I’ve gone from the standard filtered brewer to Starbucks and only Starbucks, from the k-cups of my always caffeinated college days, all the way up to my beloved French press with manually operated bean grinder in most recent history. These have all been fine methods, ones with a time and place in my life (and for some, still a very strong presence in it), but now that I have days that begin with over an hour of running, my lengthy “French press way is the best way” methodology must move aside for a bit.
I recently got a Nespresso machine and I love it! My obsession with it might be borderline unhealthy. But, I also didn’t want to trade in my prolonged coffee mornings for knocking back an espresso shot before hitting the running trails either. So what to do? Bon Appetit or my sister usually answer my distress calls for food and drink related questions. This time it was both.

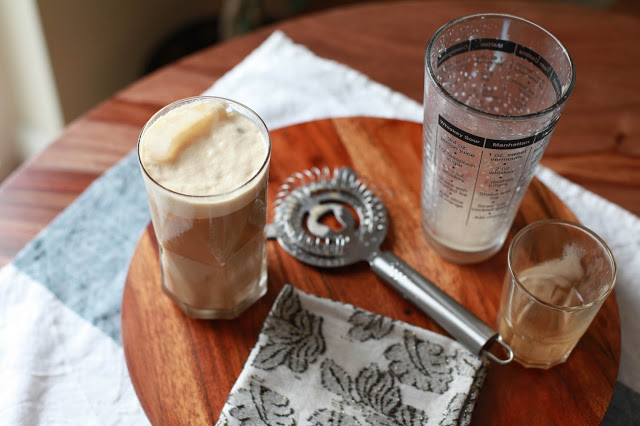
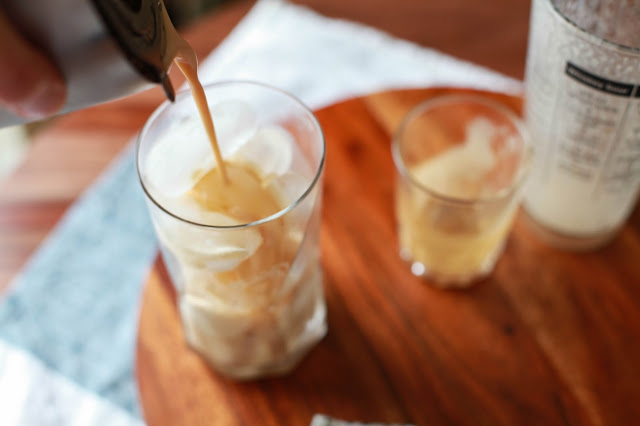
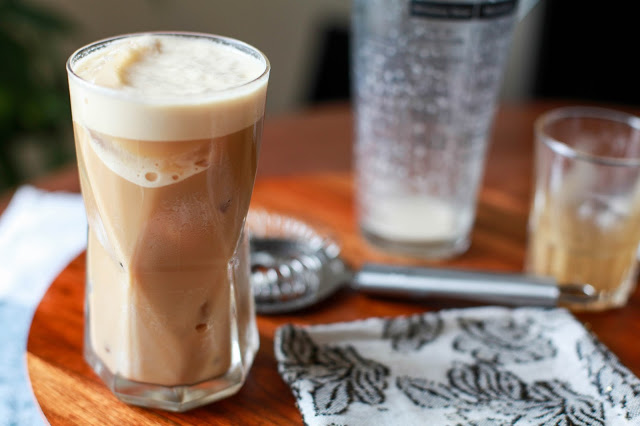
About the time I got my machine and this month’s issue of the magazine, my sister was emailing me about their iced coffee shakerato recipe. It’s a quick and simple method but the result of its 3 ingredients is something unexpected and luxurious. I mean, did you know that espresso, sweetened condensed milk and simple syrup turn into a creamy and dreamy froth-filled drink when vigorously shaken in a cocktail shaker? Yeah, I was shocked too, almost in disbelief until I tried if for myself and stood there stunned when I strained it out. It almost takes on this latte meets slushy quality and although you’d think it would be excessively sweet, it doesn’t actually seem so. I’m not going to pretend to understand the science and logic (or is it witchcraft?) taking place inside that cocktail shaker but am simply going to give thanks for it in the mornings to come, because I cannot think of much else that will make me so happy when the day must start with 25 200-meter repeats on the treadmill.
Bon Appetit’s Iced Coffee Shakerato
Adapted slightly from this recipe
makes 1 drink
Ingredients
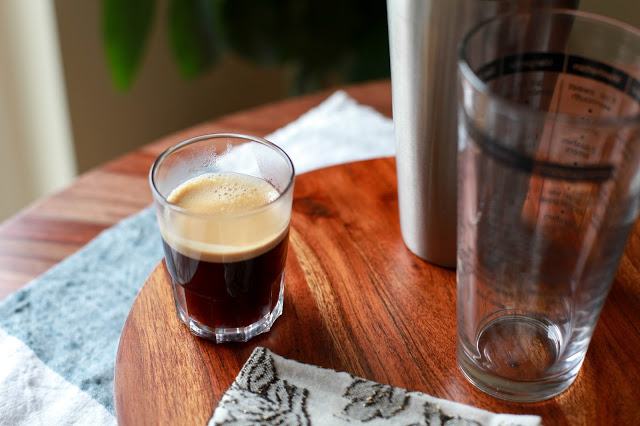
4 oz hot espresso
2 tsp. simple syrup
1½ Tbs. sweetened condensed milk
a dash of coconut or vanilla extract
optional: a shot of Irish whiskey if you’re feeling bold
Fill a cocktail shaker with ice. Add the espresso, simple syrup, condensed milk, and the extract. Cover and shake vigorously for 30 seconds. Your shaker will become very cold, the ice will be crushed and the mixture extremely foamy. Fill a glass with more ice. Use a strainer to transfer the coffee mixture to the glass, allowing some of the smaller pieces of ice chips to slip through. If using the whiskey, stir in last.