Swiss Chard Tart with Sesame Cracker Crust

So here we are, coming to the end of June, and just like last year my family an I have reached the stage of our gardening where we find ourselves in a bit of a leafy green crisis. We can literally scalp our rows of chard and lettuce and within the week they have grown back to full size. We start to run out of room in the refrigerator, out of storage containers, out of recipes. Though I suppose I can hardly justify complaining about an overabundance of homegrown vegetables. They are gorgeous and delicious and, most notably, absolutely free so we try our best to cram them into as many dishes as possible.

We have found a winner of a recipe in the recent Martha Stewart Living Food Issue Magazine, one that can rid the refrigerator of 1.5 pounds of greens in one fell swoop and is incredibly tasty at the same time. Now, a little side note, if you haven’t picked up this magazine yet, you really should. It has become a permanent fixture on the kitchen table and I discover something new to make every time I flip though it. It also has the recipe for this one-pot pasta, which has been making quite a few appearances in the foodie blogosphere lately. It may very well be the brainchild of someone with magical powers and is revolutionary in its approach to making a pot of pasta. Everything literally cooks together in one pot – you don’t even need a colander. It stands for all things cheap, easy and fabulous and will probably become a weekly thing once our cherry tomato plants begin to burden grace it with their bounty. But back to the recipe at hand…

This here is a Swiss chard tart with sesame cracker crust. To break it down its pretty much like taking the filling of spanakopita  (the recipe actually calls for all spinach but, well, we had Swiss chard so that’s what we used) and stuffing it into a tart shell that tastes like those little sesame cracker sticks in the packs of Asian-like trail mix. You know what I’m talking about, right? The pieces that everyone picks outs out of the mix first, leaving behind the stale nori crackers and wasabi peas.

You start by making the dough for the crust, which uses a dump and stir method and it comes together in seconds. It gets rolled out, placed into a tart pan, and baked until golden and crisp. The filling is mostly the greens but they get a salty punch from feta and some nice residual heat from red pepper flakes. And when the two come together and bake until piping hot, the result is simply lovely. The green surface is speckled with the bits of red, yellow, and orange stems of the chard and the scattering of white sesame seeds. The taste borders the line between light and fresh and something that is perhaps a little naughty with its rich, flaky crust. The crust holds up really well and actually stays quite crispy even after refrigerated and heated up again in the microwave. It’s a definite best contender for an easy lunch to bring to work the next day. Because of its richness, it pairs well with something a little more acidic. A pinot grigio would be nice but I had it with

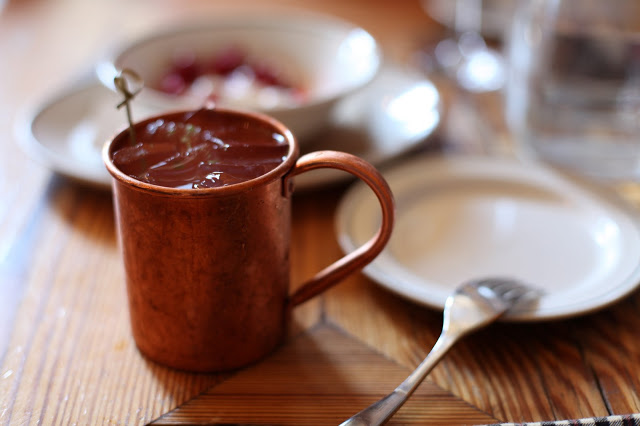
Dogfish Head Festina Peche, a brewed malt beverage with a tart and tangy taste and a lingering wheat-like finish. All in all, with a slice of this tart at hand and a cold glass of your drink of choice, this is all I want out of an early summer evening supper.

Swiss Chard Tart with Sesame Cracker Crust
serves 4-6
slightly adapted from Martha Stewart Living Magazine

Ingredients
Crust
¾ cup whole wheat flour
¾ cup all-purpose flour
1 tsp coarse salt
t Tbs. sesame seeds
1/3 cup olive oil
1/3 cup water

Filling
1½ lbs swiss chard
1 Tbs olive oil
1 large shallot, finely diced
1 clove of garlic, minced
¼ tsp red pepper flakes
3 oz feta cheese
2 eggs, lightly beaten
½ tsp. coarse salt
½ tsp sesame seeds

Start by making the crust. Preheat the oven to 425 degrees. Combine the flours, salt and sesame seeds in large bowl and whisk to combine. Add in the olive oil and water and use a wooden spoon to mix together, finishing with your hands to knead it into a uniform ball. Roll out the dough on a lightly floured surface into a circle about 2 inches wider in diameter than your tart pan (use one with a removable bottom). Fit the dough into the pan, pressing it up the sides and trimming off any excess. Prick the bottom of the dough all over with a fork and bake for about 30 minutes and let cool slightly. Once cooked, reduce the oven to 350 degrees.

While the tart crust cooks, prepare the filling. Remove the green leaves from the chard and tear them into large pieces, saving the stems. Add the leaves to a large pot with ¼ cup of water and cover. Heat on medium, stirring periodically until the leaves are wilted. Transfer greens to a sieve placed over a bowl or sink to drain the excess water and set aside. Drain any water from your pan and place over a medium heat with 1Tbs. of oil. When hot, add the shallot, garlic and red pepper flakes and cook, stirring, until the shallot is soft, about 4 minutes. Set aside.

When the chard leaves are cool enough to handle, place themin a clean towel and squeeze it over the sink to remove the extra water. Transfer to a cutting board and roughly chop. Add to a mixing bowl with the shallot mixture, crumbled feta, eggs, and salt. Stir to combine. Add the filling to the slightly cooled tart shell and evenly press it in. sprinkle the ½ tsp. of sesame seeds overtop. Bake in the 350-degree oven for 30 minutes. Remove from the oven and let cool for 10 minutes before slicing.

Woodberry Kitchen and a Moscow Mule

One of the best questions anyone has ever asked me was, “What was your favorite restaurant experience?” I thought it would be a simple answer but as I sorted through my memories trying to pick out the perfect one, I realized it wouldn’t be as easy of a task as I thought. I began to see just how many factors are at play in determining a truly memorable and life-changing moment at a restaurant. It becomes so much more than just the food, though that it important as well. It involves the people with whom it was shared, or not shared at all, the circumstance in which it occurred, the service, the ambiance, etc. A best restaurant experience is a time where for the two hours or so in which it takes place, the rest of the world seems to disappear an all that matters is that moment, a moment that can never quite be matched. Really, with that said, only a handful of my experiences can be truly deemed as great.

I did have one of those memorable moments recently at a restaurant I’ve been dying to visit for a while now, Woodberry Kitchen in Baltimore. I took my mom for Mother’s Day brunch. It’s a place where it is not difficult to relax, where people make great food with even better ingredients. A place where the utmost care seems to go into every little detail yet at the same time you get a sense that everyone seems to be rather care-free. A place where conversation flows easily, drifting out of the mouth and up across the high beamed ceilings and around the locally handmade glass light fixtures. Where the kitchen has nothing to hide but rather makes itself known with a roaring wood-fired oven and things like coffee and cocktails are treated as an art rather than an afterthought. Dishes are simple and need no fancy plating, further prompting sharing and appreciation of the fine ingredients. It was everything I wanted it to be and more.

I wish I could have tried so many more items on the menu but I feel like we did well with our selections. I started with a Moscow Mule, made with ginger beer, lime syrup, and organic vodka, and served in its traditional copper mug with lots of ice. Now normally I’m not a big cocktail fan and generally stick to beer but this is certainly an exception to that rule. It’s cold, it’s refreshing, it’s pleasantly spicy and packs an nice punch. My mom and I also started the meal with a simple bowl of fresh cut spring strawberries, soaked in bitters and doused with a generous spoonful of tarragon scented Chantilly cream.

My entrée was a wood-fired oven breakfast pizza with maple sausage, potatoes, cheddar cheese, pickled chiles, and two eggs, just barely set, so that the yolk oozed over the pizza like a nice rich sauce to offset the heat from the chiles. The crust was blackened and blistered perfectly and chewy and light inside. My mom got the asparagus and potato frittata, served in an individual cast-iron skillet. We ended by sharing a beautifully delicate pecan scone, served warm, and maple lattes made by their nationally acclaimed baristas. Seriously, best cup of coffee I’ve had in my life.

The meal really stayed with me a good while after the experience was all over. I craved pizza even more so than normal and dreamt of that Moscow Mule. The warmer days are approaching and I realized I needed to get a recipe figured out in preparation for the sweltering summer evenings. I’m currently at the beginning of what I think is going to be a big home-brewed soda kick (just bottled up some grapefruit-hibiscus soda yesterday) so naturally I started with a batch of ginger beer. You can find the recipe here. Once it was ready, the rest was easy – a bottle of grey goose, some limes, a batch of simple syrup. Hopefully my own concoction will tide me over until I can get over to Woodberry again. My birthday is coming up…in two months…

Moscow Mule
makes one drink

Ingredients
½ cup ginger beer (homemade is certainly not necessary. My favorite brand is Fentimans. It’s a little hard to find so Gosling's will do in a pinch)
1 oz good vodka
1-2 tsp. simple syrup (recipe here)
Lime juice

Fill a rocks glass (or a cupper mug, if you have one) with ice and pour over the vodka. Add the ginger beer, 1 tsp. of the simple syrup, and a small dash of lime juice. Stir to combine. Give it a taste and add the other tsp of simple syrup, if desired. Some ginger beers are sweeter than others so you may or may not need the extra sugar. Kick back and enjoy.

Nut and Seed Crackers (and a Year out of College)

One year ago I graduated from college, donning purple robes with 4000 others who were all equally as excited to bring a certain stage of our lives to a close. I recall wondering how many were in the same position as I, putting on a smiling face while on the inside thinking how college was just the easy part, how the elusive and supposedly worse “real world” was yet to come. I remember three days prior, after my last final exam, I came home and proceeded to have what could probably be described as a full-blown meltdown over the fact that “it’s all over!” I wasn’t really sad for the experience of college to be over. In all honesty I didn’t particularly enjoy a good portion my times at college. Mostly I was terrified, terrified that this safety net called “my education” was ripping at its seams and I was about to go tumbling out, grasping at mere loose threads, before falling into a dark and deep abyss.

So now here I sit 365 days later wondering where on earth all of that time in-between went. It’s as if I hit the bottom of that abyss, passed out and woke up one year later only to think I had slept for merely a night. It’s strange, but, although it feels like no time has passed at all, so much seems to have happened. So many things that I thought would become my entire life, I have now left behind and the things I wished to release and forget, I now embrace with all of my being. I graduated with slight feelings of regret, wishing I had done something different. I wished I hadn’t “wasted” my time on studying film and design and gone off to culinary school instead. Now, with nearly eight months of post-graduate restaurant experience under my belt I can assure you that my educational decision to keep my cooking hobby separate from my career was quite wise. During those eight months there was no light at the end of the tunnel. It was a place where crying was a normal daily occurrence and verbal abuse was accepted without restraint. There were moments where I began to think that this could actually be the norm. If I weren’t so stubborn and wanting of a genuine cause for leaving, I wouldn’t have put up with it for nearly as long as I did.

And just at the moment when I thought I could go on no longer, I didn’t have to. I landed a job using all of those skills that I learned in college. I finally got my career. And though I now spend my days sitting at a desk and staring at a computer, the very things I thought I did not want, I could not be any happier. In fact I can’t remember a time in the last few years when I have been this inexplicably happy. Maybe its because I work at a t-shirt design company where things like spirit days, mid-day bbqs, sporadic food extravaganzas, and the best coworkers exist, but that “real world” that everyone warned me about, feels like the best dream I could imagine. I know I’m in the right place, that everything it exactly as it should be, and it can only get better from here.

Which brings me to a recipe. I don’t think I’ve taken the time yet to express how much I love the The Sprouted Kitchen Cookbook. Sara and Hugh are the dynamic duo of this creation and it has become a favorite among my collection of cookbooks. I not only reach for it endlessly for recipes but also for tips to improve my photography and cooking and my ability to embrace the simpler things in life. It is truly a work of art and one of the best examples out here of the perfect combination of food and photos. I love Sara’s dedication to her husband at the beginning, that he was the one that helped her escape from a life she didn’t enjoy and lead her to one that means the world to her. I like to think that we are alike in this way, that we were both lost for a time and although we found our ways in totally different fields, we found them nonetheless.

I was flipping through the book the other day and found a recipe for “nut and seed crackers” tucked away inside the snack section. It’s an understated recipe, no picture and a very small caption about how great they are with hummus. After skimming through the ingredients list I found that I had everything I needed and a nearly empty tub on hummus I was looking to finish off.  So of course I made them. Though the recipe almost slips by unnoticed, these crackers certainly speak volumes. Made of nothing but ground up nuts and seeds and a splash of oil and sweetener, they start out as a crumbly greasy ball of dough but end up with a deep, toasty flavor and a soft delicate texture. They still have a good bit of dexterity though, strong enough to hold a hefty amount of topping and enough chew and protein to fill you up nicely. 

I tried them with hummus, per Sara’s suggestion, with much success, but tried a few other toppings too. They were nice with peanut butter and a sliver of apple and also with cream cheese and cucumber slices. But my favorite was a dreamy combo of whipped goat cheese and sliced strawberries with a good sprinkle of fresh cracked black pepper. Yes, black pepper…on strawberries. It’s weird but it works. Just how sea salt makes chocolate all the more chocolatey, the black pepper almost brightens the acidity and sweetness of the strawberry. And not only are they great for either breakfast or lunch, they are also vegan and gluten-free. Sounds like just the perfect way to start off the beginning of the 2ndyear out of college, this one looking much brighter than the first.

Sara’s Nut and Seed Crackers
slightly adapted from the Sprouted Kitchen Cookbook

Ingredients
½ cup almond meal
½ cup raw cashews
1 Tbs flaxseed meal
1 Tbs whole flaxseeds
1/3 cup sesame seeds
a sprig of rosemary
¾ tsp sea salt
1 Tbs agave syrup
1 Tbs olive oil
1-2 Tbs water

Combine the almond meal, cashews, flaxseed meal and whole flaxseeds in a food processor and pulse until the cashews resemble a meal. Add the sesame seeds, the leaves from your sprig of rosemary, ½ tsp of the salt, the agave, and the olive oil and pulse for a few more seconds until the rosemary is chopped up. Drizzle in 1 Tbs of the water and pulse until everything comes together into a ball. If it doesn’t, add more water 1 Tbs at a time until it does. Place the ball of dough in plastic wrap and refrigerate for at least an hour.

When ready, preheat the oven to 325 degrees and line a baking sheet with parchment paper. Remove the dough from the fridge and roll out with a rolling pin. This will be easier if you put the dough between two sheets of parchment paper or plastic wrap first. Roll out to 1/8-inch thickness. If it starts to crack at the edges you can gently push it back together before continuing. Cut the crackers into whatever shape you desire. I made 10 large-ish wedge shapes but smaller crackers would be nice too. Use a spatula to transfer them to the baking sheet and bake for about 12-14 minutes until toasted and brown. Sprinkle with the remaining salt after removing form the oven. Let cool before serving with the toppings of your choice. 

Slow Food, Fast People

I’ve lived just outside the D.C. Metro area for my entire life but I can probably count on my two hands the number of times I’ve actually been to the city. Mostly they were for school field trips and a couple of concerts but the sad part is, I can’t even recall a time I visited for the mere sake of visiting. Yet, no matter how many times I intended to take a day trip to the big city during the past, oh… year, the thought of driving an hour (not including traffic) to get to a metro station, only to sit on the metro for another 30 minutes, is quite the deterrence. Yet, when temperatures spiked to 90 degrees and cherry blossoms were in full bloom almost two weeks ago, I could wait no longer.

I turned out to be a fulfilling and all-around fun day, a mini-field trip by myself. I got lunch at my beloved Pret (and refueled with yoga bunny detox after a 2-year lapse), visited my cousin at her work, sat in a park under a cherry tree, walked around like a dazed, camera-to-face tourist, and saw the American Food history exhibition/Julia Child’s kitchen at the American History Museum. Like I said, a pretty decent day. It did leave me exhausted though and I realized that D.C is a pretty exhausting place, much more so than other cities I’ve visited. People seemed to move about 10 times faster than normal and live their lives by means of a well-planned itinerary on their iPads and a cell phone that has taken up permanent residence at their ears. It was all a bit much. So naturally, in the spirit of a more relaxed, slow lifestyle, I bought a Dutch oven…naturally.

The renowned Le Creuset has been on my wishlist for quite some time but always frightened me away with a severe case of sticker shock. It suddenly hit me though that I should check them out at a factory outlet store and ended up walking away with a nearly half-price 5.5 quart with just a few paint imperfections. Fittingly, I broke it in with some classically slow sort of food. First I made a Dutch oven paella from Cook’s Illustrated, one of those stovetop, to oven, to table sort of dishes that Dutch ovens are perfect for. But, most importantly I made Jim Lahey’s no knead bread, the singular recipe that has been sitting in my queue, waiting for this one essential kitchen tool to come along. Kneadless to say (get it), it produced the most wonderful, rustic, and effortless loaf of bread to possibly exist.

I know that I am, per usual, the last to hop aboard fads, in this case the no-knead bread bandwagon. But I always say better late than never, eh? It’s simply amazing how you can mix together a few ingredients into the saddest, shaggiest mixture and 24 hours later it’s a bubbling brew of elastic, soft dough. Again, slow food for the win. Mostly I’m excited that I no longer have to solely rely on my standard bread baking method involving that dreaded moment of tossing the 5 lb loaf precisely onto the center of the preheated baking stone with a pizza peel. Now I just preheat the Dutch oven, plop the dough inside, put the lid on, put it back in the oven, and presto, out pops bread.

And not just any bread. Bread that sings a crackly little song when pull it out. Bread that stays so soft and tender on the inside but with a perfect toothsome crust that hurts your jaw a little but in a good way. Bread that makes breakfast such a dilemma because you cant decide weather to dress it up with peanut butter or jam or leave it in its full naked glory with just a hefty swipe of salty butter overtop. And maybe you should use it for the best darn turkey bacon and avocado sandwich for lunch too...just a thought. The only problem I seem to have with it is that it disappears maybe a little too fast. But no worries, just give me another day and there’ll be another ready, no rush.

No Knead (semi-whole wheat) Bread
Recipe by Jim Lahey

Ingredients
3¼ cups (300 grams) unbleached bread flour
¾ cup (100 grams) whole wheat flour
1¼ tsp (8 grams) salt
½ tsp (2 grams) instant yeast
1 1/3 cups (300 grams) room temperature water
additional flour or cornmeal, for dusting
flax and sesame seeds for the top, optional

Combine the flours, salt, and yeast in a bowl and stir until combined. Add the water and mix using your hands or a wooden spoon until everything comes together. You don’t need to knead it, just mix until there is no more loose flour and you have a shaggy, sticky mess. This is good. Cover the bowl and set aside for 18-24 hours.

After waiting, scrape the dough out onto a lightly floured surface and fold the dough under until you have a roundish shape. Take a clean cotton towel and place it inside a clean bowl. Dust the towel liberally with flour or cornmeal and shake and seeds you may want coating your bread into the towel. Place the bread seam side down in the bowl and cover with the loose ends of the towel. Let rise for 1-2 hours.

Meanwhile, when the dough has about 30 minutes to go, place your Dutch oven with the lid on in the lower-middle rack of the oven and preheat to 475 degrees. After 30 minutes, remove the Dutch oven and take off the lid. Lift up your towel with the dough inside, place your hand underneath, and quickly invert the dough into the center of the Dutch oven – it will now be seam side up. Cover the pot and place back in the oven for 30 minutes. Then remove the lid and bake for an additional 15 to 30 minutes until the bread is deep brown. Remove from the pot with the help of a wooden spoon. If the crust is crackling and the bottom sounds hollow when you thump it, it should be done. Place on a cooling rack and wait about 2 hours before cutting open…if you can.

Loony Burgers

I discovered veggie burgers in London, strangely enough. The residence manager of my flat (who also happened to be a mother-like figure to all 28 of us on the study abroad trip) was a pescetarian but also a big foodie and therefore a powerhouse of knowledge for anyone looking for vegetarian, vegan, and all-around good, organic cuisine. She helped me discover Planet Organic, Food For Thought, Hummus Brothers and, most notably, Mildred’s, a hole-in-the-wall, vegetarian café and restaurant that just so happened to have the best vegetarian burgers and sweet potato fries in the planet. These veggie burgers are by no means a comparison to the flimsy, rubbery things in the frozen food section (do people really eat those?). I would assimilate them to a sturdier version of falafel, a swelling patty of mashed beans and whatever fresh vegetables they had that day (a certain zucchini, sweet corn, olive, and herb version was my favorite). They were served on a seeded bun with arugula and alongside crispy yet tender sweet potato fries and a basil yogurt dipping sauce.

Now I was, and still am, a meat-eater but have made an earnest effort to go meatless a couple days a week in the past 3 years or so. So back in the U.S., I desperately searched for a comparable replacement of my meatless burger only to be met with unfortunate realization. Almost all vegetarian substitutes of commonly meat-containing foods have soy as a prominent ingredient. This is a problem and has been since the first time I ate tofu and ended up with fat swollen lips and an uncomfortably prickling and itching scalp and neck. Soy products and I do not get along (except soy sauce, which for some reason gives a much reduced allergic reaction) so I have since avoided the likes of all veggie burgers in the fear of the hidden evil ingredient.

That is, until I discovered Luna Burgers.

I saw them in the freezer section of a local food co-op, a neat little package of 2 patties in a rustic brown cardboard box. I was dubious when I went to look at the ingredients, expecting the worst. But wait! Was I reading correctly? No soy?! It was just a simple, no-fuss list of basic ingredients: beans, grains, vegetables, and herbs/seasoning. And to make a long story short, the Luna Burgers came home with me. I cooked them up in a frying pan and met the same flavorful, herbaceous, and creamy yet crispy, burger-sensation as I did at Mildred’s. I found myself in veggie burger heaven, so much so that I came up with the brilliant idea of making the exact same thing myself at home. Why does it always come to this – why can’t I just buy already made things like everyone else? But I must say, it was entirely worth it.

Loosely following the ingredients list on the back of the Luna Burger package and guestimating on ingredient amounts, things somehow turned out just right the first time, resulting in 4 patties just over a quarter-pound each. They even looked like beef, tinted red from grated beets. I put the patties in the freezer for future use but you could certainly cook them right away. Just heat a small splash of olive oil in a pan and cook both sides until browned and crisp. I like them on an English muffin with spinach, cucumbers, goat cheese, and sea salt and fresh cracked pepper but the toppings are entirely up to you. Regardless of add-ons, these burgers are crazy good, so I call them Loony Burgers, the soy free, meat free, ridiculously amazing burger.

Loony Burgers
makes 4 or 5 burgers

Ingredients
½ onion, finely chopped
1 medium carrot, peeled and shredded
½ medium beet, peeled and shredded
the leaves from 3 pieces of kale, cut into small ribbons
1 can of black beans, drained and rinsed
1¼ cup cooked barley or other grain, cooked according to package instructions (lentils would make a good substitute for a gluten-free version)
½ cup rolled oats
¼ cup blueberries
½ Tbs. molasses
1 tsp. apple cider vinegar
½ Tbs. tahini
½ tsp. cumin
¼ tsp. finely chopped rosemary
salt and pepper, to taste
1 egg (optional)

In a frying pan over medium heat, sauté the onion in olive oil for 5 minutes until soft. Add the carrots, beets, kale, and a good pinch of salt and sauté for an additional minute. Set aside to cool slightly.

In a large mixing bowl, combine the beans, cooked barley, and oats and use a potato masher to mash everything together until it becomes a sturdy paste. Don’t worry about getting things perfectly smooth. Some remaining whole beans or big chunks will be just fine. Mash in the blueberries until incorporated. Add the cooled, cooked vegetables, the molasses, vinegar, tahini, cumin, rosemary, another good pinch of salt, and some pepper, and use a wooden spoon of a large fork to combine everything together. Taste and add more salt or other seasoning if needed. At this point you can add in a beaten egg (it will help to hold things together) but is not necessary if you want to keep the burgers vegan.

Refrigerate the mixture for 30 minutes. Once cool and firm, divide the mixture into 4 or 5 patties (a kitchen scale works well here to keep them the same size). You can either cook them right away or set them on a parchment lined baking sheet and place them in the freezer. Once frozen, pack the patties into a freezer safe container with a piece of parchment between each patty so they don’t stick. To cook, defrost overnight in the refrigerator or, if you are impatient like me, in the defrost setting of the microwave, and pan-fry in a bit of olive oil until hot and crisp. Assemble on a bun or English muffin with toppings of your choice.